Planting Poppies and Larkspur

larkspur

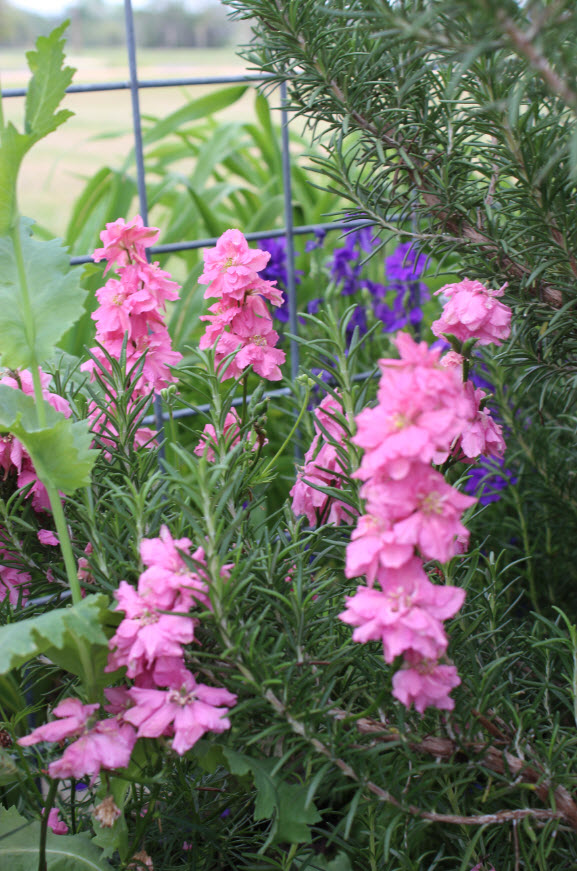
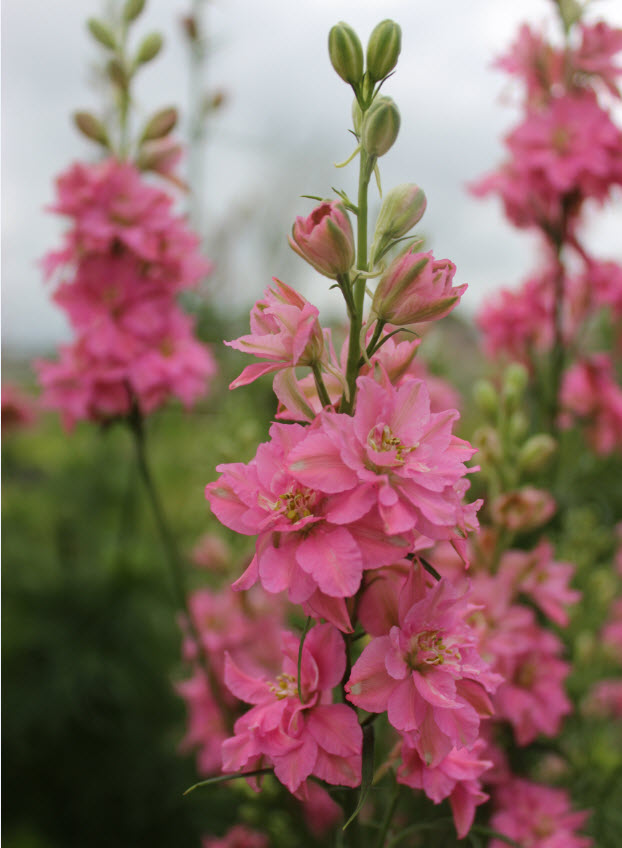
Larkspur are so beautiful and easy to grow. Plus, they re-seed readily so you will have them year after year.

Ever since Hurricane Harvey I have been swamped at work.  Twelve hour days with a three hour commute do not leave a lot of time for gardening.  This past weekend I finally got a break.  Since the weather was great I took full advantage of the last weekend of daylight savings time to plant a few perennials and lots and lots of larkspur and poppies in my latest garden adventure.

I am currently working, very slowly I might add, on a new oval shaped yard flanked by a mixed bed that will include flowering perennials, bulbs and annuals.  While the beds are still far from finished, I used this past weekend to further remove the weeds, prep the soil and plant the first of my foundation plants (Tacoma Sans, Climbing Pinkie rose and a trailing lavender lantana) and some white Datura seeds.  Once this was done I broadcast the entire tilled area with four ounces of Rocket Larkspur Tall Mix and one ounce of red Pepperbox Poppies that I bought online from Eden Brothers (The Seediest Place on Earth).

blue-larkspur

This lovely blue larkspur is grown by my friends at Texas Specialty Cut Flowers

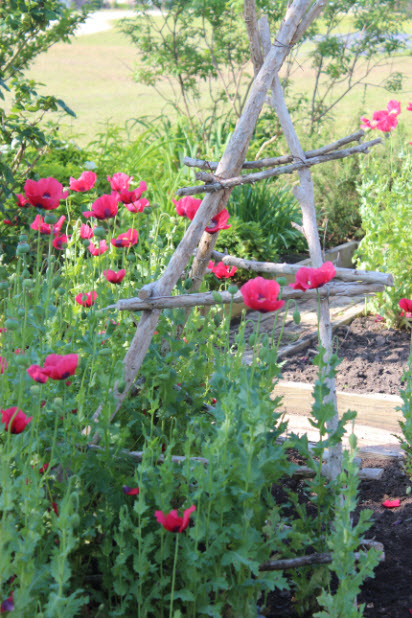
While I absolutely love poppies and larkspur I have not planted any in a few years.  And that is one of the reasons I love them.  Since both of these beautiful spring plants are prolific self-seeders you can generally plant them once and then enjoy them year after year.  Mine did this reliably – until I got chickens.  While my wife and I love our hens, our gardens have paid the price for that love.  Before chickens my poppies and larkspur would bloom reliably each spring and then either drop their seeds naturally or allow me to collect them and spread them myself.  After chickens, all the plants in my beds paid a price for their constant scratching.  However, the poppies and larkspur paid the ultimate price.

This past spring my wife and I missed our bright red poppies and our blue, pink and lavender larkspur so much that we decided that the chickens would get to live in a very lovely and large fenced yard, and we would once again fill our beds with flowers.

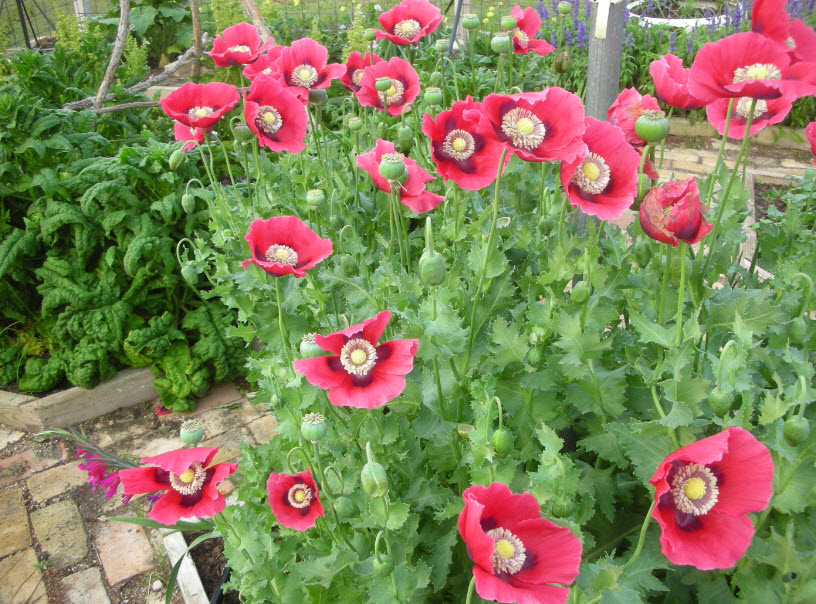
I have grown Red Pepperbox poppies for years.

Larkspur and poppies are very easy to grow.  Since their seeds are so tiny, it is easiest to plant them in a broadcast manner.  Broadcast simply means throw them out on top of prepared soil and gently water them in.  As I mentioned earlier I lightly tilled my new beds then I raked them smooth.  After that I poured the seeds in my hand and began to throw them out on top of the soil.  Once complete I raked the bed again and then walked around in it to try and ensure that the seeds made good contact with the soil.  After that I turned on a sprinkler and let it run for about 30 minutes.

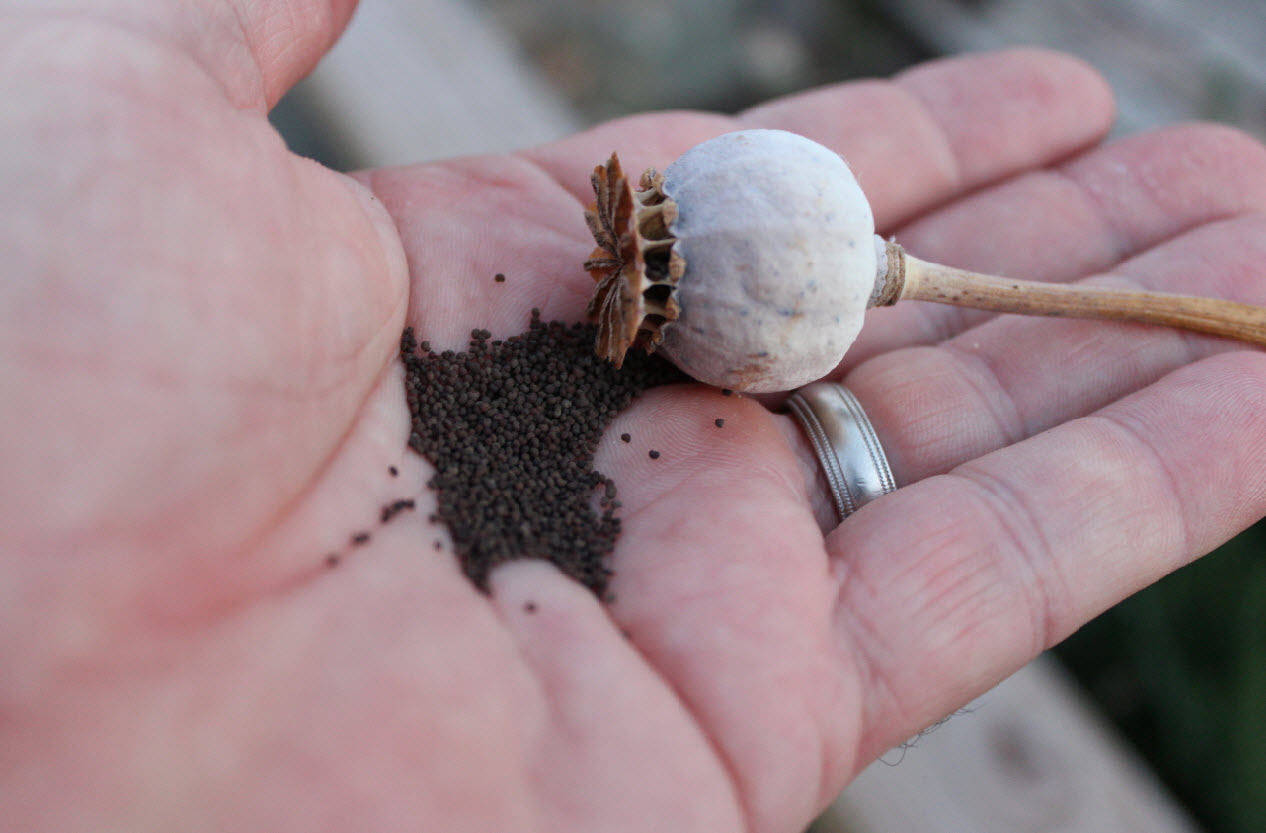
If you love to save seeds then poppies are for you. Each plant produces hundreds of seeds that you can gather yourself for next year or let nature plant for you

While easy to grow, there are a few tricks you can use to ensure the highest germination rate of your poppy and larkspur seeds.  First, plant at the right time.  Almost all cool season spring flowers, including wildflowers, need to be planted in the fall.  I actually planted a little late this year.  While I am sure they will be fine I would have preferred to get them in by late September or early October. To get the most even coverage of your bed be sure to spread your seeds when there is no wind.  These seeds are tiny and even a small breeze can carry many of them away before they hit the ground.  You can also get great coverage, make your seeds go further, and reduce the threat of wind loss by mixing them with sand before you spread them.  After your seeds are down water them in gently.  Too much water, or water that has too much pressure, can wash away many of your seeds before they get a chance to sprout.

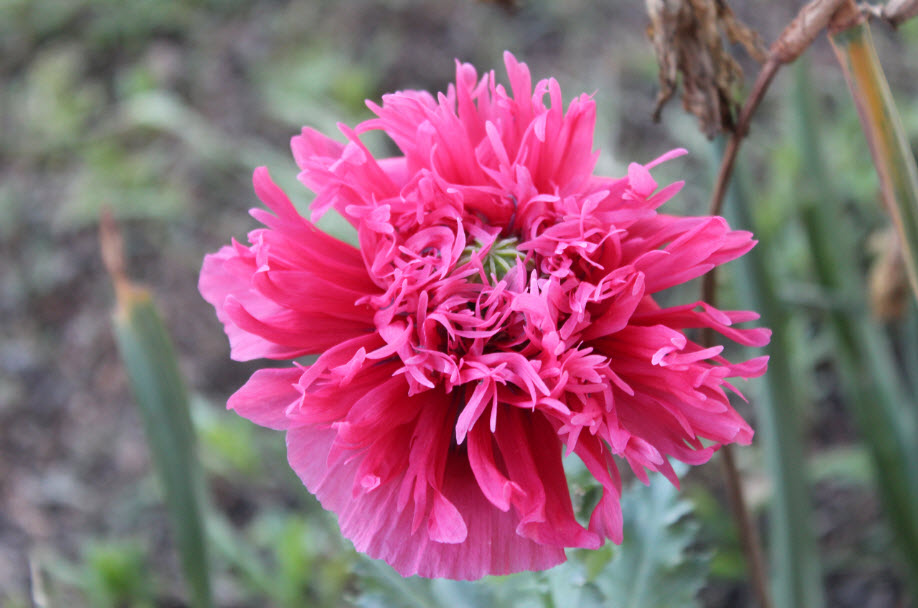
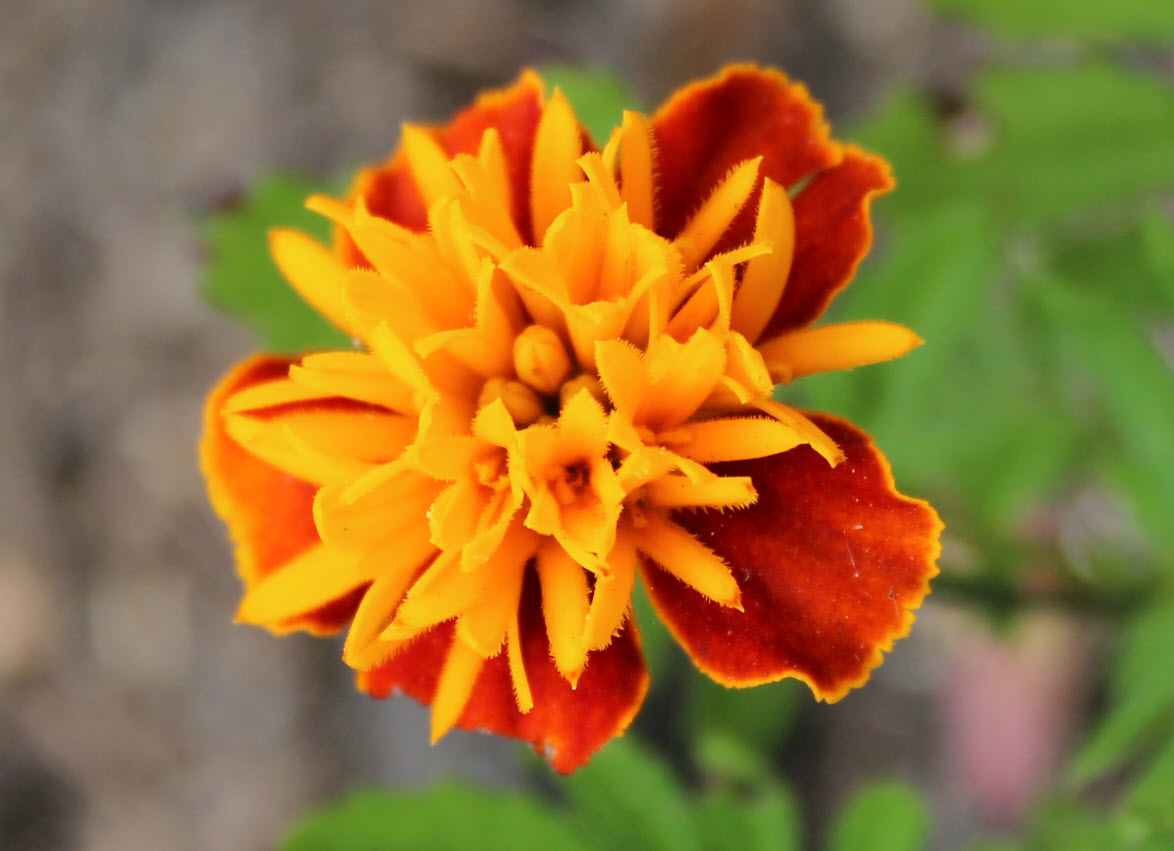
Poppies come in a colors and forms. From simple California and Icelandic poppies to the beautiful doubles like this pink that my friend Patty Leander grows.

I once read a quote that said “No garden is better than next year’s garden”.  I love this quote because it speaks to me about the optimism gardeners feel each and every time we plant.  I can honestly say that thanks to my poppy and larkspur seeds I am as excited about next year’s garden as any garden I have ever had.  Nothing picks up my spirits more than the promise of beds full of beautiful spring flowers.

My wife recently spent a lovely afternoon with Nelda Eubank of Austin.  Nelda is the mother of an old friend, a long time gardener and a long time reader of the blog.  She has been a little under the weather lately.   Hope the promise of next year’s garden helps get her on her way to a full recovery. red-pepperbox-poppy-2

Fall Into Winter Vegetables on Central Texas Gardener

If you have questions about what to grow in the fall and winter garden, then this week’s episode of Central Texas Gardener is perfect for you.  Patty and I were thrilled to be invited to talk about fall gardening on this award winning  PBS (KLRU) television program.

In my opinion Fall is the best time of the year to garden in Texas.  The temperatures are milder and the weeds are not nearly as aggressive.  Plus, you can grow so many great vegetables!  While it is a little late for tomatoes it is the perfect time to plant broccoli, cauliflower, cabbage and Brussels sprouts.  It is also a good time to plant root crops like beets, carrots, turnips, radishes and parsnips.  It is also time to start your salad greens.  Fall and winter are the ONLY time you can grow your lettuce and spinach in Texas. danvers-carrots

I have been a fan of CTG for years.  Growing in Texas is challenging and their experts and guest always have the right answers for the problems I am dealing with in my own garden.  If you are not a regular viewer, or you do not get CTG on your local PBS channel, go to their website (http://www.klru.org/ctg/ ).  Each and every segment they do is available on YouTube on their site or on their YouTube Channel.   texas-lettuce

This was my first time in a television studio and I was a little nervous.  However producer Linda Lehmusvirta and host Tom Spencer (and the Hays County Master gardeners) made the whole experience so much fun.  I would also like to thank all of the people behind the scenes at KLRU for making Patty and I feel  so comfortable in front of your cameras. Heck, I didn’t even get offended when you had to put make up on my bald head to kill the glare!

Many thanks to the whole KLRU, and the Hays County Master Gardeners for a truly wonderful experience!

Many thanks to the whole KLRU crew, and the Hays County Master Gardeners, for a truly wonderful experience!


Make Room for Cool-Season Peas by Patty Leander

This weekend I will be planting a lot of sugar snap peas.  I love these peas but it can be a bit tricky to make these babies thrive in our hot climate.  Below is a re-post of a great article from Patty Leander that will give you all the info you need to successfully grow these garden treats.

There is nothing better than fresh green peas from the garden.  Photo by Bruce Leander.

There is nothing better than fresh green peas from the garden. Photo by Bruce Leander.

A few months ago I wrote about heat-loving Southern peas (Vigna unguiculata), but now that September is here and temperatures have begun to cool off ever so slightly, it’s time to switch gears to cool-season peas (Pisum sativum): sugar snaps, snow peas and garden peas.

Peas have been in cultivation around the world for thousands of years, but the sugar snap pea that we enjoy today is American-made, thanks to a plant breeder named Calvin Lamborn of Idaho. In the 1970’s he crossed a garden pea with a snow pea, resulting in a tender pea with a crisp, sweet, edible pod. This new pea was introduced to the public in 1979, and has been a sensation ever since. ‘Sugar Snap’ was the original introduction of edible-podded peas.  It is a vining variety that can reach 5-7 feet. ‘Super Sugar Snap’ is an improved version with resistance to powdery mildew.  Both varieties mature in 62-65 days.

Cascadia Peas ready for harvest. Photo by Bruce Leander

Most peas are compact bush types that grow 24-30” tall and begin producing slightly earlier than the vining types.  A few reliable sugar snap varieties include ‘Cascadia’ (58-60 days to maturity),

‘Sugar Ann’ (52-56 days), ‘Sugar Bon’ (56 days) and ‘Sugar Sprint’ (55-58 days). If garden or shelling peas are more to your liking try the heirloom varieties ‘Wando’ (68 days) or ‘Little Marvel’ (62 days). A more recent introduction is the 2000 All-American Selection winner called ‘Mr. Big’ (58-62 days), a vining variety which grows 5-6 feet and  produces large pods filled with 8 to 10 plump green peas.


Wando shelling peas ready for harvest. Photo by Bruce Leander

Sugar snap peas can be eaten at any stage of development; the entire pod is edible when the peas inside are small and immature. Fresh, crunchy pods can be served with dip or sliced and added to salads. Whole pods are delicious sautéed or roasted (see accompanying recipes). Peas that are allowed to fully mature can be shelled and prepared like any garden pea, by simmering in a small pot of water just until tender.

Peas can be a challenge to grow because they are particular about the weather and must be planted during a short window of opportunity. Too hot and they will wither away, too wet and they succumb to powdery mildew, too cold and they will drop their blooms and potential pods. Plant peas at least 8 weeks before your first average freeze in fall so plants have time to grow and mature before the cold weather sets in. In my Central Texas garden I usually plant peas in early September, and again a week or two later. Then I keep my fingers crossed and hope that the peas grow fast and our first frost comes late.

Cascadia Pea blooms. Photo by Bruce Leander

The soil will still be hot at these recommended planting times, so try shading it with row cover, shade cloth, burlap or several layers of newspaper for a week or so before planting to help moderate the temperature. Planting after a rain is ideal, but if you are not so lucky be sure to irrigate a day or two before planting so the soil will be moist and ready to receive seed.

Because peas are legumes they have a special relationship with a beneficial soil bacteria called Rhizobia. The peas allow the bacteria to live on their roots and the bacteria extract nitrogen from the air and convert it to a form the plants can use. If you are planting peas in a new garden, a container or an area of your garden that has not hosted legumes before you can encourage this relationship by inoculating the pea seed before planting to ensure that the bacteria is present in the soil. The inoculant is often available at garden centers or it can be ordered through most seed catalogs. The process is simple and involves nothing more than coating the dampened seeds with the inoculant powder before planting.


To harvest pods: hold the vine in one hand and pull pod with the other. Photo by Bruce Leander

Plant the seed 1-1½” deep and 3-4” apart. Bush-type varieties that grow 24-30” are considered self-supporting, but I find that they are easier to tend and easier to harvest if given some kind of support. They will also get better air circulation (therefore less prone to disease) if grown upright and off the ground.  Try using string or chicken wire tied between stakes or insert pruned branches next to the plants for support.  The tall, vining varieties, like ‘Super Sugar Snap’, must have sturdy support and should be planted at the base of a tall tomato cage, a fence or a trellis.  Once your peas start producing, harvest them frequently for peak quality and to encourage more production. And be sure to use two hands when harvesting or you could easily pull up an entire vine (been there, done that).

Your home-grown peas that travel from garden to kitchen in mere minutes will look better, taste better and cost less than any fresh sugar snap pea that you can buy at a grocery store – yet another reason to grow-your-own!


Sugar Snap Peas with Mushrooms. Photo by Bruce Leander

Sugar Snap Peas with Mushrooms

Some peas, especially heirloom varieties, have strings, so be sure to snap off the end and peel the strings off before cooking.

½ lb sugar snap peas, trimmed

1 T olive oil

½ lb mushrooms, sliced

Sauté peas in olive oil 3-5 minutes. Add mushrooms and sauté 5 minutes. Season with salt and pepper and serve.

Roasted Sugar Snap Peas

1 lb sugar snap pea pods, trimmed

2-3 Tbsp olive oil

½ tsp salt

¼ tsp pepper

Toss pods with olive oil and sprinkle with salt and pepper. Roast in a 475° oven for 12-15 minutes.

Tomato Trellises

If you have ever grown tomatoes, you know they have to be trellised.  If this is going to be your first year growing tomatoes, understand that “they have to be trellised”.  I have yet to meet the tomato bush that does not grow so big that it can fully support itself.  I guess that’s not true really.  All tomatoes can support themselves in their own way.  However, their way involves sprawling all over the ground.  This sprawl will work fine for the tomato since all it really cares about is reproducing.  It doesn’t care if its seeds are in fruit lying on the ground or if the seeds are in fruit that is 6’ up in the air.  However, as gardeners, we care very much where the tomato seeds (fruit)  are on the plant.  Because of this, if you are going to grow them successfully, you have to support them.

A homemade tomato trellis in my potager

A homemade tomato trellis in my potager

Why Trellis? – Since the tomato plant has the ability to create roots anywhere along its stem, tomatoes vines will root wherever they touch the ground.  This will create an ever wider and wider bush if left alone.  All of that vining uses up nutrients that can and should be channeled into fruit production.  Trellises allow you to prevent this. A properly trellised tomato will have one and only one point of contact with the soil.  This will allow you to control branching and keep your fruit from lying on the ground where it will quickly cause rot and attract insects, bunnies and other pests.

Trellising adds support to limbs that can become very heavy when laden with fruit.  High winds are the enemy of large tomato plants and the trellis will provide extra protection against it.  Also, trellising allows you the added support needed to open the bush up through pruning.  This increased air flow through the plant allows moist plants to dry quickly (thus limiting fungal infections).  An open bush also makes tomato harvest easier and it provides access to the inside of the bush if you need to apply organic or inorganic pesticides.

This "Celebrity" has already outgrown its store bought cage and it is only half grown

This “Celebrity” has already outgrown its store bought cage and it is only half grown

Types of Trellises – Trellises can be very simple or very elaborate.  You have to decide what works best for you.  A local greenhouse grows a hydroponic “tomato forest”.  Their vines grow ten to twelve feet in the air.  They grow these massive vines by clipping them to a single nylon cord attached to the roof and the growing area.  You can’t get much simpler than one string!

Bill uses "hog rings" to assemble his cages.  You can see full instruction in his book, "The Texas Tomato Lover's Handbook"

Bill uses “hog rings” to assemble his cages. You can see full instruction in his book, “The Texas Tomato Lover’s Handbook”.  This photo is the property of William D. Adams and cannot be reused without witten consent.


Probably the most commonly used trellises are those welded wire rings that we get at the big box or local garden center.  While convenient, I have found that even the largest ones sold are inadequate for my needs.  If you are growing two or three plants in pots, the store bought “cages” will probably be fine for you.  If you are going to buy cages, I recommend you buy the biggest ones available.  Since these cages are made out of small gauge wire, their welds are weak and they will begin to break apart after just a few uses. 

Sturdy cages allow you to apply shade cloth that will protect your young plants from cold, wind and some bug damage

Sturdy cages allow you to apply shade cloth that will protect your young plants from cold, wind and some bug damage.  This photo is the property of William D. Adams and cannot be reused without written consent.

A common homemade version of the tomato cage is made by bending a heavy gauge wire mesh into a circular cage.  These work very well, but storage can be a problem.  Since they can’t be stacked inside each other (like the store bought cages) they can take up a lot of room in the garage.  Also, since they don’t have long wire “legs” like the store bought version, you will have to find a way to stake them.  Rebar and zip ties work very well for securing them to the ground.

My friend Bill Adams cuts cattle panels into three sections and then ties them together in a trianglular shape with metal clips (read more about these in his book “The Texas Tomato Lover’s Handbook”).  These are really great.  They are tall enough and strong enough to support the bushiest tomatoes out there.  After assembly, he uses a “T-Post” to secure the cage in place.  Theses “cattle panel cages” are durable enough to last a lifetime.  Plus, they provide a perfect surface to add shade cloth.  Shade cloth can do so much for your tomatoes.  If you use  it when you first put the plants out, you can easily add a top to the shade covered cage to keep in heat and avoid damage from a late season cold snap.  The shade cloth will also protect your tender young plants from sun scald, wind damage and also add some insect protection.  While there is some cost associated with this method, your cages will give you a lifetime of service.  In addition to durability, they are also very practicle.  At the end of the season, you can easily disassemble them and store your panels flat against the garage wall. 

Bills cages provide all of the support and protection your tomatoes will ever need.  This photo is the property of William D. Adams and cannot be used with written consent.

Bills cages provide all of the support and protection your tomatoes will ever need. This photo is the property of William D. Adams and cannot be used with written consent.

I also use cattle panels to support my tomatoes.  However, I don’t cut my panels up.  I line my tomato rows with cattle panels on each side of the row.  I place my panels about 32’ to 36” apart and support them with T-Posts.  As the tomatoes begin to bush, I can slip bamboo lengthwise through the panels to support any branches that become heavy with fruit.  There is one slight drawback to my method.  Since the tomatoes are grown between panels, I have to do all of my harvest and pruning “through the fence”.  However, the squares on the panels are large so this is only a minor inconvenience.

I grow my tomatoes between two rows of cattle panels

I grow my tomatoes between two rows of cattle panels

In my potager, I grow my tomatoes on “decorative” trellises that I made by wiring together small cedar limbs.  These trellises are very attractive and, since they are cedar, they last a very long time.  While not as functional as the cattle panels or the cages, they work well for determinate tomatoes.  This year, I am growing romas in them.  Roma tomatoes create a nice, neat, and compact bush that do not require as much support as an heirloom or big indeterminate like “Better Boy”.

I am currently growing roma tomatoes in my homemade, cedar trellises.  These trellises are six years old and still going strong

I am currently growing roma tomatoes in my homemade, cedar trellises. These trellises are six years old and still going strong

A Wounded Hummingbird

Every once in a while, something amazing happens.  For my wife and I, this Sunday brought us one of those amazing surprises.  While outside mowing the yard, our carpentar stopped her and showed her what appeared to be a half grown, wounded, ruby throated hummingbird laying in the grass.  She was surprised when the she bent down to pick it up that he offered no resistance.  She brought it to our son who took it inside and put it in a box that we had been using as a chicken brooder.  The bird was absolutely alert and alive, but he offered no resistance to our handling. 

Our tiny little friend was barely longer than two joints of Chris's finger

Our tiny little friend was barely longer than two joints of Chris’s finger

Chris brought him a drink in coke bottle lid a helped him get a small sip.  After a few minutes we checked on him and were surprised to find he had flown out of the box.  We decided this must mean he had been healed of whatever ailed him so he took him out and placed him on our deck.  Again, he just sat there motionless.  So, since it not every day you can get this close to a hummingbird, I went in and grabbed the camera.  I was lucky enough to get this truly beautiful shot of this truly amzing little creature.

Pictures like this make me truly appreciate my Canon Rebel

Pictures like this make me truly appreciate my Canon Rebel

After I took these pictures, I felt the little guy would be safer in the Chinese Privet that lines our deck.  So, I picked him up and gently started carrying him to the bush.  Before I got there, he bolted out of my hand and flew directly to the redbud tree that sits at the southeast corner of the potager.  If you think full grown hummingbirds are amazing, you should see one when it is “small”.  He was so tiny.  I cannot believe that God can make something so perfect and beautiful in such a small scale.  Everything from his tiny little feet, to his tiny little irridescent feathers was beautiful and perfectly formed.  It truly was a joy to be able to share a few moments with this amzing creature. 

The irridescent feathers of the Hummingbird are so lovely

The irridescent feathers of the Hummingbird are so lovely

I have seen countless hummers leave our feeders and go directly to that same spot in the redbud that our little friend escaped to. I hope there is something safe and nurturing in that tree that will heal our new little friend so he can join the others of his species around our feeders this summer.

My Accidental Lily (Lilium species)

I have to admit, until recently I was not fond of lilies.  In fact, I disliked them so much that I instructed my entire family to ensure that, on some glad morning when my life is over (and I fly away), there are no lilies in any of my funeral sprays.  I know that is a little weird but I evidently have some early childhood trauma associated with funerals.  To this day, when I smell that sweet, sweet smell of a lily I am thrust back in time to my grandmother’s wake and funeral.  Having her body in the house and the smell of all of those lilies evidently scarred my little seven year old psyche.

My "surprise" lilies

My “surprise” lilies

Recently, I have begun to rethink my aversion to these truly beautiful flowers.  Last year when we were in Tulsa, we visited the gardens at the Gilcrease Museum.  The beds surrounding Thomas Gilcrease’s house were scattered with clumps and clumps of some very beautiful Oriental lilies.  I was so taken with them that I began to rethink my aversion.

The reason I am writing about lilies now is because I have a beautiful orange Oriental lily blooming in the potager.  The funny thing is, I don’t know where it came from.  I certainly didn’t buy it.  My best guess is someone gave it to my wife as a gift and after the bloom faded I just stuck it in the ground.  Well, if that is what happened I am certainly glad that it did.

One of the lilies at the Gilcrease

One of the lilies at the Gilcrease

Lilies are a lot like roses when it comes to their importance in almost all cultures.  These flowers have been grown, loved, painted, written about, carved and sculpted by people all over the world for thousands of years.  White lilies have a special place for all Christians.  No Easter celebration is complete without pots and pots of pure white Easter Lilies on the altar or pulpit.

It is almost impossible to go into a Catholic Church and not see lilies.  Because they represent innocence, chastity and purity, they are often seen either in Mary’s hands or somewhere very close to her.  Legend says that the first lilies sprang forth from Eve’s tears as she cried repentantly while being expelled from the garden.  Since Mary is often called the new Eve (who bore the fruit that redeemed us from sin) she always has a lily nearby.

Some of my Easter Lilies emerging after winter

Some of my Easter Lilies emerging after winter

Many flowers that have lily in their name are not lilies at all.  Daylilies are members of the genus Hemerocalis and Oxblood lilies belong to the genus Rodaphiala.  True lilies belong to the genus Lilium.  Lilies are perennials that grow from bulbs that are typically deeply buried.  When planting lilies it is recommended that you plant them 2 ½ times as deep as the bulb is tall.  Lilies like full sun and average moisture.  An inch a week during their growing period is fine.

Lilies reproduce by seeds and rhizomes.  Some species even put out stolons.  These rhizomes form new bulbs.  After a few seasons a single bulb can create a very large and thick clump.  When this happens it is a good idea to dig them up and divide them in the fall of the year.

Remove lily stamens to extend their life as a cut flower

Remove lily stamens to extend their life as a cut flower

One of a lilies most recognizable features are their prominent reproductive organs in the middle of the flower. The pollen covered stamens are lovely to look at and dance in the breeze.  However,  if you want to use your lilies in an arrangement, you need to remove the stamens.  Some lily pollen will stain a pure white bridal gown.  Plus, removing the stamens will actually extend the life of the cut flower.

My “accidental” lily has been a bright spot in my spring time garden.  It is truly beautiful and I have thoroughly enjoyed watching it bloom.  However, no matter how pretty it is, I still don’t want any of them at my funeral!

2013 Garden Experiment-Companion Planting of Marigolds and Tomatoes

Each year I like to try some kind of experiment in the garden.  I truly believe that the best way to become a better gardener is to try new things.  This year I will be putting one of the most commonly talked about organic pest control methods to the test.  I am going to try a companion planting of tomatoes and marigolds to keep the stink bugs away.

One of my "porch grown" marigolds is about ready to bloom

One of my “porch grown” marigolds is about ready to bloom

If you believe everything you read, then you no doubt believe that marigolds are miracle plants.  It is truly amazing to me how many articles/posts there are on the internet making incredible claims about their bug fighting abilities. One of the more recent things I read swears that all you have to do is plant a marigold in each corner of your garden and all of your bug problems are solved.  While there may be some truth to the marigold’s bug fighting abilities, I really don’t believe they are going to very successful at riding my tomatoes of their stink bugs.

The above marigold two days after opening

The above marigold two days after opening

Now don’t get me wrong.  I really want my experiment to work.  In fact, I have gone out of my way to give the marigolds as much of a chance as possible.  Instead of trying to plant four plants in the corners of my garden, I am going to completely surround the tomatoes in marigolds.  For this experiment, I grew about 100 marigold plants from seed in my new back porch seed starting rack.  Once the little plants got up to about four inches tall I used them to line the triangular beds of my potager.  I planted the starts six inches in from edge and spaced them at six inches.  It took about 20 plants to line each bed.

My first "bug fighting" marigold of the year

My first “bug fighting” marigold of the year

Once the flowers were in, I planted the tomatoes.  For this experiment I am using romas.  Romas grow on nice, neat determinate bushes.  My thought is, those nice, compact determinate bushes will give all of those pesky bugs fewer places to hide.  I am also hoping that their relatively open form will allow whatever magic bug fighting qualities the marigolds possess to waft freely deep into the bush where the bugs are hiding.

Holidays mean free labor.  My daughter jessie helps me plant the marigolds for my experiment on Easter Sunday

Holidays mean free labor. My daughter jessie helps me plant the marigolds for my experiment on Easter Sunday

I apologize a little about my attitude here.  I really, really, really want the marigolds to run all of the bugs off.  However, I am very skeptical.  Even though I am doubtful of the marigold’s bug fighting abilities, I do truly expect they will keep any nematode issues at bay.  It is a proven, scientific fact that marigold roots secrete alpha-terthienyl.  This compound has insecticidal, nematodial and anti-viral properties.  It also stops nematode eggs from hatching.

I love my larkspur.  This has absolutely nothing to do with the experiment but it is lovely and i just wanted to include it!

I love my larkspur. This has absolutely nothing to do with the experiment but it is lovely and i just wanted to include it!

My last big garden experiment was growing potatoes in a box.  That one was a complete failure.  I had very high hopes for that one when the experiment started.  For this one, my expectations are a bit lower.  I expect to have almost aero nematode problems but I really don’t expect the marigolds to be very successful at keeping the bugs away.  Only time will tell.  Check back at the end of the season to see how it goes.

Edible Landscape Tour

Currently, one of the hottest trends in landscape design is called “Edible Landscapes”.  Edible landscapes seek to incorporate vegetable, herbs, berries and fruit trees into urban and suburban landscapes. 

The backyard of one of the homes on the tour. Photo by Bruce Leander

I can attest that it is pretty easy to create an attractive outdoor space using a mix of fruiting plants and ornamentals.  Each season my little potager contains lots of vegetables mixed in with daylilies, salvias, justicias and dianthus.  The structure and color that these ornamentals add make the less showy vegetables much more attractive to look at.

I strive to make my spring and fall potager as attractive as possible.  While the aesthetics are important, there are a couple of side benefits to this combination of plants that make the garden much more efficient and productive.

Pansy, viola, carrots and shallots in my 2011 fall garden

First, since this is a vegetable garden, I mulch everything fairly well.  This mulch moderates soil temperatures and reduces water lost to evaporation.  Because of this, I am able to keep a fairly large amount of plants alive on MUCH less water than would be required to keep up a lush lawn of the same size.

Increased pollination is another side benefit of mixing vegetables and ornamentals.  Since I have a wide range of flowers that bloom throughout the year, my potager is always full of bees and other pollinators.  In addition to giving me something else to watch while I am in the garden, these pollinators make sure that I get lots tomatoes, squash and cucumbers every season.

Another yard on the edible landscape tour. Photo by Bruce Leander

If you would like to learn more about edible landscapes, you can join my wife and I at the Travis County “Edible Gardens Tour” In Austin.  My friend (and fellow MOH blogger and Texas Gardener writer) Patty Leander will be giving a presentation on the healthy aspects of vegetable gardening at the Agrilife Extension Center.  If you don’t want to start your tour at the Extension office, feel free to start at any of seven houses that are on the tour.  You can get your tickets, schedule and map to the houses online.  The tour kicks off at 9:00 and there will be short presentations at each one.  This is a great opportunity to see and learn from some very good gardeners that are doing great things by combining edibles and ornamentals in their yards and gardens.  As an added bonus, some of houses on the tour also use water wise gardening practices.  With the constant threat of water restricitions, this will be a great opportunity to pick up some of the tips and tricks you need to continue growing food when the rains don’t come.

The tour costs $15 per person in advance and you can reserve your tickets on the event website (Click Here).  The tour will start at the Travis County Agrilife Extension Center located at 1600-B Smith Road in Austin.  Hope to see you there!

P.S.  If you can’t make the tour in person be sure to watch KLRU’s “Central Texas Gardener”.   Their October 13 show will feature many of the gardens and the gardeners that are featured on the tour.  Their schedule is below.

Channel Day Date Time
KLRU    SaturdaySunday

Monday

Oct. 13Oct. 14

Oct. 15

Noon & 49 a.m.

5:30 a.m.

KLRU Q (18/3) TuesdayWednesday

Friday

Oct. 16Oct. 17

Oct. 19

6:30 p.m.7:00 a.m.

9:30 a.m.

KLRN (San Antonio) Saturday Oct. 13 11 a.m.
KNCT (Killeen & Waco) Saturday  Oct. 13  1:30 p.m.
KBDI (Denver, CO) SundayTuesday Oct. 14Oct. 16 2 p.m.2:30 p.m.
KPBT Midland (Permian Basin) Monday Oct. 15  12:30 p.m.
KAMU (College Station) Saturday Oct. 13 5:00 p.m.
KRSC (Claremore, OK) SaturdayTuesday Oct. 13Oct. 16


10:30 a.m.1:30 p.m.
KTWU (Topeka, KS) multiple days & times    

also on UNCMX Raleigh-Durham and K32EO Colorado Springs


See MOH on TV This Weekend!

Nine months ago, the folks at KLRU’s Central Texas Gardener (CTG) came and filmed my potager for an upcoming fall gardening segment on CTG. Well, that “upcoming time” is finally here!  I am so excited to have this opportunity and I want to say a great big thank you to Linda Lehmusvirta and crew for all of the hard work they did on this.  Click on the link below to watch it now.

Central Texas Gardener now airs on five Texas public television stations and is coming soon to New Mexico. Check the station link listed below for the most recent local schedule.

KLRU / 18-1, Austin

  • noon & 4:00 p.m. Saturdays
  • 9:00 a.m. Sundays (repeat)

KLRU-HD, Austin

  • noon & 4:00 p.m. Saturdays
  • 9:00 a.m. Sundays (repeat)

KLRU-Q / 18-3, Austin

  • 6:30 p.m. Tuesdays
  • 7:00 a.m. Wednesdays
  • 9:30 a.m. Fridays

KAMU, College Station

  • 5:00 p.m. Saturdays

KNCT, Killeen

  • 1:30 p.m. Saturdays
  • 5:30 p.m. Sundays

KLRN, San Antonio

  • 11 a.m. Saturdays

KWBU, Waco

  • 3:30 p.m. Saturdays
  • 12:30 p.m Thursdays

KPBT, Midland (Permian Basin)

  • 12:30 p.m. Mondays

KBDI, Denver

  • 2:00 p.m. Sundays
  • 2:30 p.m. Tuesdays

2012 Fall Gardening Tips

Right now it is so hot outside I work up a sweat just walking to the garden.  Photo by Heather White

August 1 is the official kick off date for fall gardening in my part of Texas.  In reality, I actually start working on my fall garden around the middle of July.  Like most of us in zones 7-9, my tomatoes are basically done by July 4th.  When your spring tomatoes stop setting fruit you have two choices.  Pull ’em up and replace with new plants in August, or trim your exisiting vines up, give them a little shade, a few nutrients, and wait for the temperatures to drop.

In my opinion, the best way to ensure a fall tomato harvest is to keep your spring plants alive through July and August. These mature plants will flower and bloom much faster than new plants put out in August.

Ever since the November night that I was late to my anniversary party because I was building cold frames out of old windows around the tomato plants I planted in August, I have been in the tomato trimming group.  Little tomato plants planted in the 100 degree August heat will not always produce red ripe tomatoes before our first freeze.  Because of this, I try and keep my spring tomato plants alive through July and August.  To keep my spring tomato plants alive, I prune them by about a third to a half in mid-July.  I then add a thick layer of composted chicken manure, mulch and put up some sort of shade.  For me, this has been the best way to ensure a harvest of a few fall tomatoes.

While I am out trimming tomatoes I also do a good garden clean up.  July is when I pull down any vines on my trellises that have stopped producing.  This can included beans, gourds, cucumbers, cantelopes and squash.  I also pull up any old mulch that is still lying on top of the ground.  I take all of this dead vegation directly to the burn pile.  Many of those bugs that caused you so much grief earlier in the year are sleeping and laying eggs in the mulch and plant liter under your plants.   Because of this, removing it and burning it twice a year is a good pest control measure.

Put out a fresh layer of compost on your clean Fall beds. Animal manures like cow manure and chicken manure are a little higher and nitrogen than the palnt types. I use these to give a boost to my newly trimmed tomatoes.

After my beds and trellises are clean, I amend the soil.  I add about 3″ of whatever compost is on sale to the tops of my beds.  I don’t usually till this compost in.  I actually kind of use it as mulch.  The compost will eventually get worked in when I plant or it rains or through the natural processes of all of the tiny little animals in the soil that feed off of the compost.

Finally, to conserve moisture, cool remaining roots and protect all of those micro-organisms in the soil I add a fresh deep layer of hay mulch.  If you mulch with hay you need to be careful.  Alot of herbicides that farmers use to control weeds in their hay crops are very persistent.  There can be enough residue is some hays (particularly bermuda hays like coastal, Tifton and Jiggs) to kill your new plants that are trying to germinate or become established.  I typically use rice straw as my mulch.  In my experience rice hay has no residual herbicides and very few weeds.

A large $70 roll of rice hay will supply me with all of the mulch I need for an entire year of gardening

After doing all of this prep, I spend a lot of time on the internet figuring out what I am going to plant and when I am going to plant it.  This year, I found the best planting guide/calendar I have ever seen.  This guide is on the Austin Organic Gardeners  website.  (they also have one for herbs).  Instead of a list of dates, this calendar is a graphical representative of the entire year.  It’s easy to read format allows you to quickly look up any plant you want.  The headers show every month broken down into weeks and the rows are an alphabetical listing of all of the vegetables we can grow in this area.

This very good planting guide is on the Austin Organic Gardeners website. This graphical guide is the easiest to use that I have found. They website has one for herbs as well.

My grandmother used to say you could find something nice to say about anything.  So, I am going to say something nice about Texas summers.  Even though it is 106 in the hot Texas sun right now, that sun is what is going to allow me to grow some of my favorite vegetables over the next six months.  I know it is hot out there, but now is the ideal time to get that fall garden going.  All of the sweat of July and August will pay off big in September and October.  So suck it up and get busy.  You will forget all about how hot July was when you are OUTSIDE in your garden harvesting broccoli, cauliflower, collards, and cabbage in January!